Contents 

Welcome
Quick start
Quick start guide
Choosing an output type
Importing photos and video
Importing background Music
Organizing the menu
Authoring the disk
Authoring a video
User guide
How to Create, Open, and Save projects
Creating a new project file
Opening a project File
Saving a project File
Output type
Output aspect ratio
How to add photos and video to your slideshow
Importing images & video
Adding a blank slide
Rearranging slides
Removing slides
Setting the slideshow menu thumbnail (Optical output types only)
Slideshow settings
Slideshow settings
Disk chapter markers
How to edit and decorate a slide
Rotating a slide
Setting display length
Setting the transition effect between slides
Duplicating a slide
Editing a slide's input media
Adjusting an image's colors
Cropping an image
Orientaing a decoration
Adding an outline mask
Trimming a video
Changing the text on a template design
Slide tab options
Using a pre-design slide template
Setting the background
Decorating with text, images and video
Adding text
Editing the text font style
Adding images, video or clipart
Manually selecting a decoration
Setting the time region a decoration is shown for
Setting the exact position of a decoration
Setting the transparency of a decoration
Setting the exact rotation of a decoration
Additional decoration options
Adjusting the pan & zoom regions
Adding filters
Adding a border
Ordering the decoration layers
Adding a motion effect to a decoration
How to add background music
Importing music
Removing music
Rearranging the background music order
Making a music track end on a slide
Trimming a background music track
Synchronize slideshow to the background music
Advance audio options
How to add a narration to your slideshow
Recording a narration for your slideshow
Rearranging narrations
Adding a narration or sound from an audio file
How to preview a slideshow
Previewing a slideshow
How to organize the menu disk structure (Optical output types only)
The PhotoVidShow disk structure and editor
Creating a new slideshow album
Deleting a slideshow album
Moving a slideshow
Changing the menu title or slideshow thumbnail text
Creating a new sub menu
Importing a slideshow from another project
How to set a menu theme (Optical output types only)
Setting menu background image and music
Setting menu layout and button style
Setting menu duration
Adding further decorations and altering a menu
Setting navigation button style
Setting the disk highlight style
How to author your project
Encoding with motion blur
How to create a video from your slideshow
Creating a video from your slideshow
How to burn your project to DVD, Blu-ray or CD
Setting the output TV standard
Setting the Blu-ray resolution and fps
Reduce output to TV safe region
Ignoring menus
Including original material on the disk
Setting the disk image folder
Selecting a writer
Other editor options
Top tool bar options
Relinking project files
Undo and Redo
Un-installing
Contact

PhotoVidShow user manual

Prev Page Next Page

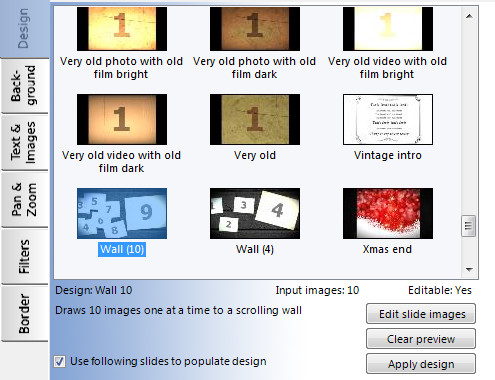
Using a pre-slide design template

PhotoVidShow provides a collection of pre-slide design templates. These template designs can make a normal one static slide after another type slideshow a bit more dynamic.

Template are slides which have already been created for you and often contain a mixture of movement and effects. All the user need do, is specify input images and in some cases specify the text.

To set the design of a slide, select the slide in the storyboard panel and then select the 'Design' tab on the left.

From here, left click on a template in the list to preview it in the preview panel on the right. If you are happy with a template design, left click the 'Apply design' button.

Often, many template designs will require more than one image input. PhotoVidShow will automatically select following slide images to populate the design. If you do want it to do this, un-select the 'Use following slides to populate design' option.

When you create a slide from a template, often not all the inputs will have been defined. In this case PhotoVidShow will show them as a blank color (with a number shown). So often the first thing you may want to do is define this missing images. This can be done by left clicking the 'Edit slide images' button which brings up the 'Edit slide media' window. From here you can define each image and text.

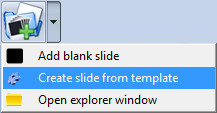
Note:Many template designs could of been manually created using the other slide tab options. Sometimes this is not the case for more complex ones.

Sometime a template design may actually consist of more than one slide. In this case, if you were to select this type of design, the other option tabs for editing the slide will not be available. The 'Editable' label will tell you if a template is further editable or not.

Tip:If you have selected a non editable template design, it may actually still possible to edit it. There are caveats to this of course. If you right click over a non editable slide in the storyboard panel and select 'Split into editable slides', then the slide will be split into individual editable slides. Because each slide will be similar and linked together in some visual way, a change on one slide will often mean the same change will have to be applied to another slide.

To create a new slide from a template design,select 'Create slide from template' option which is a sub option in the 'Add pictures or video to slideshow' button.


Converted from CHM to HTML with chm2web Pro 2.85 (unicode)